Current Position: Homepage >  News and Trends / Enterprise News

Maintenance Guide: Sharpening Blades for Skid Steer Brush Cutters

Release Date: 2026.04.27


Safety and Pre-Inspection

  • Lockout/Tagout (LOTO): Ensure the skid steer loader is completely powered down. Remove the ignition key and lock the operator cabin to prevent accidental engagement.

  • Blade Removal: Detach the blades from the cutting head. NEVER attempt to sharpen blades while they are still mounted to the equipment.

  • Personal Protective Equipment (PPE): Operators must wear ANSI-rated safety goggles or a full-face shield, cut-resistant gloves, heavy-duty work clothing, and hearing protection.

  • Cleaning & Structural Check: Remove all debris, soil, and resin from the blade surface. Inspect thoroughly for stress cracks, deformation, or excessive wear. If the blade’s structural integrity is compromised, replace it immediately.
    p20240829162442a3538

Tool Selection and Geometry Specs

  • Equipment Selection: * Manual Sharpening: Suitable for minor touch-ups. Use an angle grinder equipped with a high-quality metal grinding disc.

    • Machine Sharpening: For precision results, use a specialized circular saw blade grinder or a CNC grinder with a diamond wheel (specifically for carbide-tipped teeth).

  • Maintaining Geometry: It is critical to preserve the OEM (Original Equipment Manufacturer) specifications for the hook angle (rake), clearance angle (relief), and side angles. These angles are engineered to optimize cutting efficiency and heat dissipation. Refer to your product manual for specific degree parameters.

The Sharpening Process (Carbide-Tipped Blades)

  • Secure Workpiece: Use a heavy-duty bench vise or a dedicated blade jig to ensure the blade is immobilized during grinding.

  • Indexing: Mark the starting tooth with a paint pen. Ensure that an identical amount of material is removed from every tooth to maintain rotational balance.

  • Grinding the Relief Angle (Back): * The relief angle (typically $5^\circ$ to $15^\circ$) reduces friction between the tooth and the material.

    • Apply consistent pressure and follow the factory contour. Grind until the "rounded" worn edge is restored to a crisp, sharp point.

  • Grinding the Rake Angle (Face): * The rake angle controls chip formation and discharge. Lightly grind the face of the tooth, removing only enough material to ensure a clean surface.

  • Precision Measurement: Use a digital vernier caliper to verify that the height and width of all teeth remain uniform. Variance should not exceed 0.1mm.

  • Deburring: Use a fine-grit whetstone or emery cloth to remove any "wire edges" or burrs resulting from the grinding process.

Balancing and Operational Testing

  • Static Balance Test: Place the blade on a horizontal balancing mandrel. If the blade consistently rotates to a specific heavy spot, lightly grind the blade body (non-carbide section) on the heavy side until the blade stays stationary at any position.

  • Installation: Reinstall the blades using a torque wrench to ensure all bolts meet the manufacturer’s specified torque settings (ft-lbs/Nm).

  • Operational Validation:

    • Perform a low-RPM "dry run" to check for abnormal vibrations or harmonic noise.

    • Gradually increase to operational speeds.

    • Conduct a field test to ensure smooth tracking and high-efficiency cutting.


Product Consultation Hotline
+86 538 8503797 8503798

Product Consultation Hotline and quotation

If you are interested of our products,pls keep touch with me immediately


Copyright © 2021 
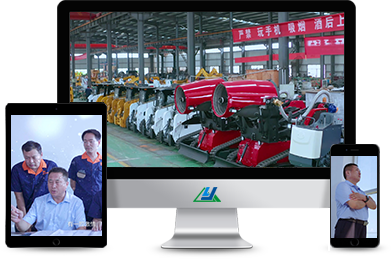
Taian Luyue Modern Agricultural Equipment Co., Ltd.